Apex Legends Gibraltar Character Guide: Tips On Playing As The Shielded Fortress
externe Festplatte Test spannender Staubsauger Test add facebook like button aktueller Drucker Test Tweet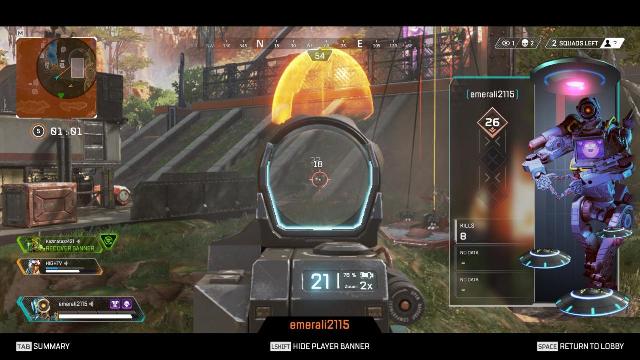
Team balance is pretty important in Apex Legends. Developer Respawn Entertainment shakes up the battle royale formula by including individual characters you can choose at the beginning of a match. That means the best teams aren't just thinking about how to beat other players, but how they can support and complement each other on the battlefield. Other than the medic character Lifeline, there's not another Legend in Apex as team-oriented as Gibraltar.
Gibraltar is a defensive player, with abilities that are all geared toward standing his ground, protecting teammates, and making it tough for enemies to put fire on his squad. Used effectively, Gibraltar can save teammates' lives and turn the tides of fights by making your team's position more defensible than the enemy's. But perhaps more than most other characters in Apex Legends, effective communication with Gibraltar is key, because he can do as much harm as he can good at times.
Playing as Gibraltar takes some getting used to, but once you've put some time in, you'll be saving your squad with dome shields and potentially dropping whole squads with effective mortar strikes. We've got all you need to know about Gibraltar's abilities, plus a whole mess of tips to help you make the most of any situation when playing as him.
We've also run down a whole lot of useful information Apex Legends doesn't tell you, and spent some time myth-busting to find out exactly what is and isn't possible in Apex Legends, so check those out. You might also want to read our Apex Legends review.
Other Character GuidesCaustic Guide: Tips On How To Be The Best Toxic TrapperLifeline Guide: Tips On How To Be The Best Combat MedicMirage Guide: Tips On How To Be The Best Holographic TricksterPathfinder Guide: Tips On How To Be The Best Forward ScoutWraith Guide: Tips On How To Be A Dangerous BamboozlerGeneral OverviewGibraltar is called the "Shielded Fortress" on the Legends select screen, and that's the best way to think about him. Most of his abilities are about absorbing damage and pushing the other team back and away from your squad, and they're all useful in a pinch when you're in a bad situation. Gibraltar is great to have on a team for those fights that aren't going your way, when you need a second to heal, reset, or retreat.
The trick with Gibraltar is not getting too cocky about the shields he carries around. Yes, they're good at absorbing damage and can give you a couple extra seconds in a fight, but used poorly, they can also become a huge liability. Over-reliance on your shields can make you vulnerable to smart players, and your shields can block your teammates as well as your enemies. Communication about when to use your capabilities is key to using them effectively, so your team knows exactly what to expect and when to expect it. Almost none of the other characters require as much team awareness as an effective Gibraltar does.
When used right, Gibraltar can totally shift a battle, making a position indefensible, forcing an enemy team on the run, closing off part of the battlefield to fire, or giving you the time you need to retreat or flank. He's also great in a stand-up fight with weapons like the Spitfire LMG or Peacekeeper shotgun because he can take a little more punishment than other characters. As long as you know your limits, Gibraltar can help you wreck other teams.
SkillsPassive Ability: Gun Shield
In any given fight, Gibraltar gets a leg-up on whoever he's battling with his Gun Shield. This is a damage-absorbing shield that covers his midsection whenever he's aiming down the sights of a gun. It can take a fair amount of punishment and make inaccurate players stumble against you as you fill them full of lead, but it has the drawback of requiring a sacrifice in mobility to use it. That makes the Gun Shield good for midrange or close encounters where you can benefit from taking time to aim, while your opponent is more likely to hit the shield and not you.
Tactical Ability: Dome Shield
Your dome shield can be essential in any given fight. It creates 15 seconds of protection around a giving area, absorbing all fire in or out. That makes it great for blocking big attacks like air strikes, but any time you're facing down a situation that's not great, the shield can keep you alive long enough to get your bearings and get back the upper hand. The key is to avoid over-reliance on the shield--both teammates and enemies can walk right through it, so most people respond to seeing a bubble shield by switching to a shotgun and charging straight into it for close-range cleanup.
Ultimate Ability: Defensive Bombardment
While Gibraltar's abilities are mostly about defending against gunfire, his ultimate can do serious damage to unsuspecting enemies. The Defensive Bombardment is a mortar strike that drops bombs around a smoke grenade Gibraltar throws onto the battlefield, and anyone caught in the middle can get fairly wrecked by it. Unlike Bangalore's airstrike, Gibraltar's covers a circular area around the smoke grenade used to call it, so you can drop it right on an enemy position, in a specific place you want to force people away from, or even on yourself--it's great when combined with the Dome Shield to push a team away from you or quickly finish them off.
Tips To Play As GibraltarGibraltar is a defensive hero, and you should try to use him as such whenever possible. That doesn't mean you don't get into a fight when you need to--aggression often pays off in Apex Legends, because giving a team a chance to heal up or revive enemies can lose you a fight. But the Dome Shield and Defensive Bombardment abilities are great for slowing or stopping an opposing team or giving your teammates the edge, so always think about how you can help keep your squad alive.
Your Gun Shield is a handy boost in a fight, but it carries serious drawbacks, so think about when you want to use it and when you don't. It blocks a lot less damage than you think, and the loss of mobility means more fire comes at you. Use the Gun Shield when you have a weapon advantage, with something like a shotgun or an LMG, at a range where you're more likely to do more damage than you take. It can also be effective when you're sniping if you've got extra cover. In every instance, though, don't rely on the Gun Shield to save you, because it probably won't; it's best for giving you an edge, and that edge can be especially handy at closer ranges.

Defensive Bombardment is a highly versatile ultimate. Drop it at the beginning of a fight to force another squad to scramble out of cover, or wait till you're in close and they're committed to fighting you turn the battlefield into a disaster area. The bombardment is also great for dropping on enemies you've knocked down: In most cases, the mortar strikes will kill them, and you might get lucky as a teammate tries to get the revive. Just note that you can take damage from your own bombardments, but your squadmates will be immune to it.
If you've got a teammate down, try throwing the Defensive Bombardment on their location, then running in and dropping a Dome Shield. Mortars will keep anyone from charging you, in most cases, while the shield will give you ample time to pick up your teammate, with the possibility that they'll also have time to heal up a bit, too.
Dome Shields are actually highly vulnerable, so be careful how you use them. They block incoming fire, but turn into death traps if an enemy with a shotgun gets bold enough to run in. Try using them at range when possible to avoid having anybody close the gap on you, and remember that being behind the shield is just as effective at stopping fire as being inside it. Keep mobile and adapt even when shielding.
Domes are extremely visible to the enemy, and they cut through walls, so they basically give away your position whenever you use them. It's possible to use that to your advantage, though; dropping a shield makes an enemy squad think they know where you are, giving you a chance to try to not be there. The misdirect can be especially effective with Bangalore's smoke or Caustic's gas, allowing you to move away from the shield while your enemies are focusing on the wrong thing.
You don't just have to use bombardments to attack enemies--try dropping them at choke points or in areas where you're worried a team might try to flank you. The bombardment is deadly, but its real defensive function is to push squads out of position and make them move, so try to use it to control the battlefield. The same is true of the Dome Shield, which you can position to block incoming fire from flankers while you deal with a closer, more pressing threat.
If you're trying to escape a fight, try dropping the Dome Shield behind you as you go. It'll block incoming fire like a wall while you keep moving, allowing you to get some distance on your attackers while they fire on you. If you're lucky, the shield's position might cause them to lose track of you as well.
You can turn off Gibraltar's Gun Shield anytime you want to, and if you're trying to discreetly target enemies without being seen, it's a good idea to switch it off. Seen by opponents, the shield is a big, orange, glowing rectangle, and like the Dome Shield, it's very visible. Just remember to switch it back on for closer fights.
It's possible to drop your Dome Shield generator on top of a Lifeline healing drone. That lets you push the floating drone forward, moving the shield, giving you a mobile barrier.
Info from Gamespot.com
Advertisement
Contacts
All questions and suggestions for site
Email us: support@readyforgame.com